1
2
3
4
5
6
7
8
9
10
11
12
13
14
15
16
17
18
19
20
21
22
23
24
25
26
27
28
29
30
31
32
33
34
35
36
37
38
39
40
41
42
43
44
45
46
47
48
49
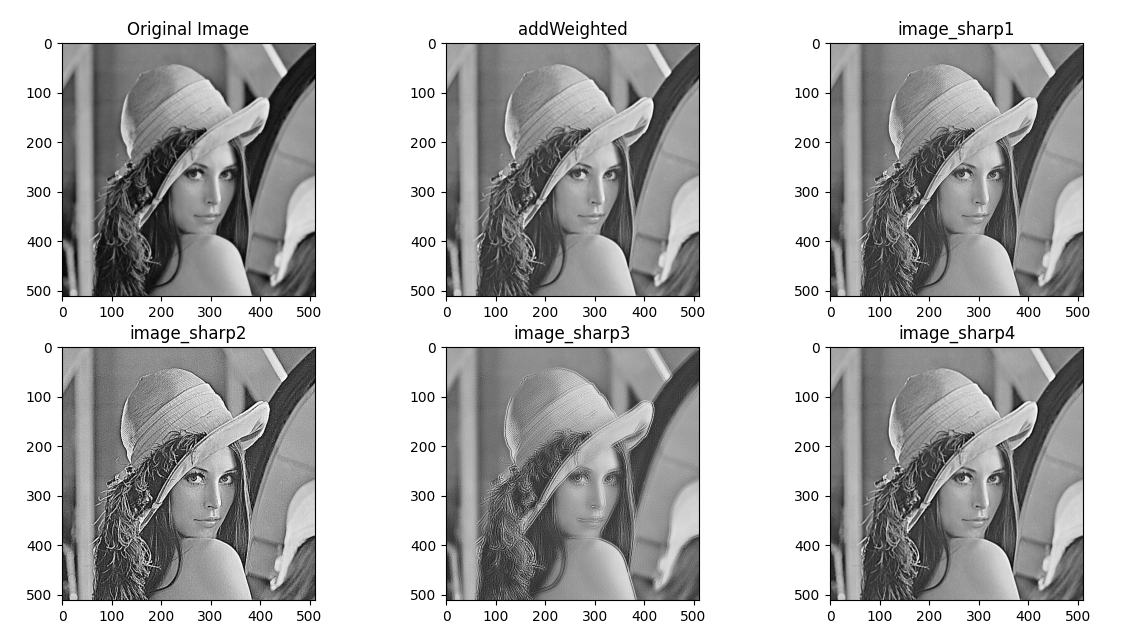
| import cv2
import numpy as np
import matplotlib.pyplot as plt
image = cv2.imread('images/lenna.png', cv2.IMREAD_GRAYSCALE)
kernel_sharpen_1 = np.array([[0, -1, 0],
[-1, 5, -1],
[0, -1, 0]])
kernel_sharpen_2 = np.array([[-1, -1, -1],
[-1, 9, -1],
[-1, -1, -1]])
kernel_sharpen_3 = np.array([[1, 1, 1],
[1, -7, 1],
[1, 1, 1]])
kernel_sharpen_4 = np.array([[-1, -1, -1, -1, -1],
[-1, 2, 2, 2, -1],
[-1, 2, 8, 2, -1],
[-1, 2, 2, 2, -1],
[-1, -1, -1, -1, -1]]) / 8.0
smoothed = cv2.GaussianBlur(image, (5, 5), 1)
unsharped = cv2.addWeighted(image, 1.5, smoothed, -0.5, 0)
image_sharp1 = cv2.filter2D(image, 0, kernel_sharpen_1)
image_sharp2 = cv2.filter2D(image, 0, kernel_sharpen_2)
image_sharp3 = cv2.filter2D(image, 0, kernel_sharpen_3)
image_sharp4 = cv2.filter2D(image, 0, kernel_sharpen_4)
fig, ax = plt.subplots(2, 3, figsize=(10, 5))
ax[0][0].imshow(image, cmap='gray')
ax[0][0].set_title('Original Image')
ax[0][1].imshow(unsharped, cmap='gray')
ax[0][1].set_title('addWeighted')
ax[0][2].imshow(image_sharp1, cmap='gray')
ax[0][2].set_title('image_sharp1')
ax[1][0].imshow(image_sharp2, cmap='gray')
ax[1][0].set_title('image_sharp2')
ax[1][1].imshow(image_sharp3, cmap='gray')
ax[1][1].set_title('image_sharp3')
ax[1][2].imshow(image_sharp4, cmap='gray')
ax[1][2].set_title('image_sharp4')
plt.show();
|