[Angular] OpenLayers로 지도 생성

OpenLayers는 개인 또는 상업 프로젝트에 지도를 추가해야 하는 경우 광범위한 사용 사례에 적합한 오픈 소스 라이브러리입니다. 아래 단계를 따라 하면 몇 분 안에 빠르게 실행할 수 있습니다.

Angular 프로젝트를 한 번도 해본 적이 없는 경우 새 프로젝트를 만드는 방법을 보여 드리겠습니다. 하지만 해당 부분을 건너뛰고 OpenLayers를 기존 프로젝트에 추가할 수 있습니다.

새 Angular 프로젝트 만들기

이 시점에서 첫 번째 Angular 프로젝트를 설정하는 방법을 보여 드리겠습니다. 모든 컴퓨터 운영 체제를 사용할 수 있으며 Angular는 macOS, Linux 및 Windows에서 작동합니다. 이것은 지금 사용하는 설정입니다.

1
2
3
4
Angular CLI: 16.1.0
Node: 18.15.0
Package Manager: npm 9.5.0
OS: win32 x64

먼저 Angular를 처음 사용하는 경우 로컬 환경을 설정해야 합니다. Node.jsnpm이 필요합니다.

설치된 버전을 확인하려면 다음 명령을 실행하십시오.

1
2
node -v
npm -v

자, 새 프로젝트를 만들어 봅시다.

command line interface(터미널, 명령 프롬프트)를 열고 새 Angular 프로젝트에 사용하려는 디렉토리로 이동합니다. Angular CLI를 설치하려면 다음을 실행합니다.

1
npm install -g @angular/cli

이제 작업 공간을 만듭니다.

1
ng new openlayers-demo

그리고 앱을 실행할 수 있는지 확인하십시오.

1
2
cd openlayers-demo
ng serve — open

잘하셨습니다. 이제 OpenLayers 설정을 시작할 준비가 되었습니다.

Angular 프로젝트에 OpenLayers 추가

최신 버전의 OpenLayers를 설치합니다.

1
npm install --save ol

이 시점에서 앱을 제공하려고 하면 앱이 컴파일되지 않는 것을 알 수 있습니다. 이 문제는 Openlayers 6.6 이상 버전에 존재하므로 위의 명령에 @6.5를 추가하여 Openlayers 6.5 버전을 사용하도록 결정할 수도 있습니다.

그러나 이후 버전에 존재하는 문제를 해결하는 방법을 살펴보겠습니다. 아래와 같이 ol 라이브러리와 관련된 오류가 표시됩니다.

1
2
3
4
Error: node_modules/ol/source/Cluster.d.ts:136:31 - error TS2314: Generic type 'Feature<Geometry>' requires 1 type argument(s).
136 protected features: Array<Feature>;
Error: node_modules/ol/source/Cluster.d.ts:152:23 - error TS2314: Generic type 'VectorSource<Geometry>' requires 1 type argument(s).
152 protected source: VectorSource;

오류를 해결하려면 tsconfig.json 파일을 열고 compilerOptions 안에 "skipLibCheck":true 옵션을 추가합니다.

1
2
3
4
5
6
7
8
9
10
11
12
13
14
15
16
17
18
19
20
21
22
23
24
25
26
27
{
"compileOnSave": false,
"compilerOptions": {
"baseUrl": "./src",
"outDir": "./dist/out-tsc",
"sourceMap": true,
"declaration": false,
"module": "es2020",
"moduleResolution": "node",
"experimentalDecorators": true,
"allowSyntheticDefaultImports": true,
"importHelpers": true,
"target": "es2020",
"typeRoots": ["node_modules/@types"],
"lib": ["es2018", "dom"],
"paths": {
"@core": ["@core/"],
"environments": ["environments/"]
},
"resolveJsonModule": true,
"skipLibCheck": true
},
"angularCompilerOptions": {
"fullTemplateTypeCheck": false,
"strictInjectionParameters": false
}
}

이제 OpenLayers CSS Style을 프로젝트에 추가하십시오. angular.json 파일을 열고 기존 CSS Style 옆에 "node_modules/ol/ol.css" 를 추가합니다.

1
2
3
4
5
6
7
8
9
10
11
12
13
14
15
16
17
18
19
20
21
22
23
24
25
26
27
28
29
30
{
"$schema": "./node_modules/@angular/cli/lib/config/schema.json",
"version": 1,
"newProjectRoot": "projects",
"projects": {
"openlayers-demo": {
"projectType": "application",
"schematics": {
"@schematics/angular:component": {
"style": "scss"
}
},
"root": "",
"sourceRoot": "src",
"prefix": "app",
"architect": {
"build": {
"builder": "@angular-devkit/build-angular:browser",
"options": {
...
"styles": [
"src/styles.scss",
"node_modules/ol/ol.css"
],
}
}
}
}
}
}

이제 지도를 넣을 수 있는 컴포넌트를 만들 차례입니다.

1
ng generate component map

컴포넌트의 콘텐츠를 추가합니다.

map.component.html

1
<div id="map" class="map"></div>

map.component.scss

1
2
3
4
.map {
width: 100%;
height: 500px;
}

map.component.ts

1
2
3
4
5
6
7
8
9
10
11
12
13
14
15
16
17
18
19
20
21
22
23
24
25
26
27
28
29
30
31
import { Component, OnInit } from '@angular/core';
import 'ol/ol.css';
import Map from 'ol/Map';
import View from 'ol/View';
import { OSM } from 'ol/source';
import TileLayer from 'ol/layer/Tile';

@Component({
selector: 'app-map',
templateUrl: './map.component.html',
styleUrls: ['./map.component.scss'],
})
export class MapComponent implements OnInit {
public map!: Map;

ngOnInit(): void {
this.map = new Map({
layers: [
new TileLayer({
source: new OSM(),
}),
],
target: 'map',
view: new View({
center: [0, 0],
zoom: 2,
maxZoom: 18,
}),
});
}
}

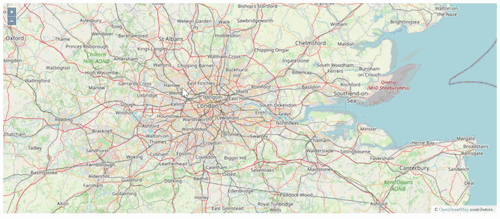
OSM 은 OpenStreetMaps를 의미하며 여기서는 표준 지도를 사용하지만 OpenLayers는 다양한 지도 Tile Servers, 이미지 등과 함께 작동하며 사용자 고유의 레이어를 만들고 사용자 지정할 수도 있습니다.

마지막 단계는 지도 컴포넌트의 내용을 포함하도록 루트 html 파일 app.component.html의 내용을 바꾸는 것입니다.

1
<app-map></app-map>

이제 작동하는 웹사이트를 확인할 시간입니다!

openlayers

이 글에서는 OpenLayers 라이브러리로 Angular 프로젝트를 설정하여 웹사이트에서 지도를 사용하는 방법을 배웠습니다.

Share